

Securely access a private web server using a proxy server and P2P
August 18, 2026
Access to "private web servers" hosting internal content or systems is restricted to PCs connected to the internal LAN. Furthermore, remote access requires connecting to the internal LAN via a VPN using PC. However, standard VPN environments face emerging security challenges, such as vulnerability exploits and subsequent attacks. Therefore, I would like to propose a establishing a secure remote access environment for private web servers using a "Proxy Server + P2P" architecture.
Why "Proxy Server + P2P"?
In a typical VPN environment, a combination of dedicated server hardware and software creates a network-level boundary between the "internal" (secure) and "external" (insecure) environments, with the VPN server acting as the gateway to the internal LAN and remaining exposed to the Internet.
Consequently, VPN server devices are susceptible to attack; if a vulnerability is exploited to breach them, there is a risk of unauthorized access to the entire corporate network.
I therefore concluded that I could ensure security against unauthorized access by establishing an independent private access environment between the corporate LAN and PCs using a "Proxy Server + P2P" setup, thereby eliminating the need to expose the corporate LAN directly to the Internet.
The access environment
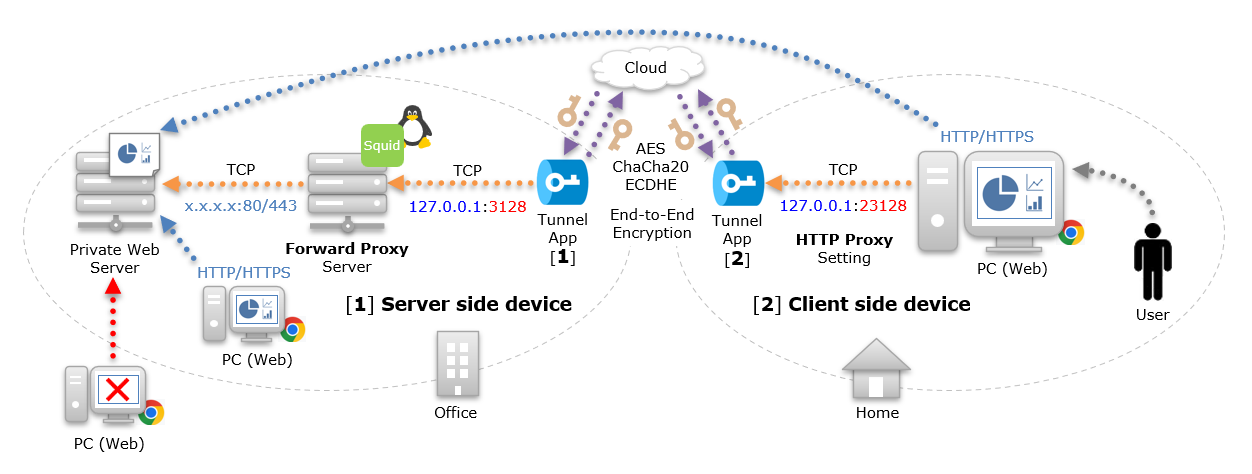
The access environment uses an Android smartphone, and a Windows PC connected to the camera. Then, use a "Tunnel App" for the network environment that connects Android and Windows. Regarding the access setup, a "Squid" forward proxy server is installed within a network that has access to the private web server, and external PCs are configured with HTTP proxy settings. Additionally, the "Tunnel App" is used for the network connection between the PCs and the proxy server. (This is a P2P app developed by us and provided free of charge)
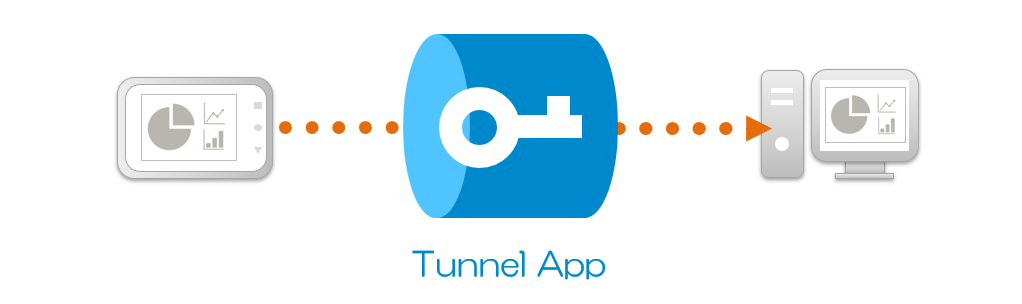
The Tunnel App is installed and used on two devices, one app accepts access from the client app on a proxy port, and the other app accesses the server app. Communication data between apps on your device is end-to-end encrypted, so you can safely access the data without it being seen by third parties.
Proxy server setup
For the proxy server's operating system environment, Linux will be used, and "Squid" will be installed and set up.
For details about "Squid," please check the official website (https://www.squid-cache.org/, etc). This article assumes the use of the default listening port, "3128."
This article assumes the existence of a private web server accessible via the URL "https://private.example.com" from within the same network as the proxy server.
* Even for a private web server intended solely for internal use, the implementation of HTTPS (SSL/TLS) communication and login authentication is recommended for reasons related to security and browser specifications.
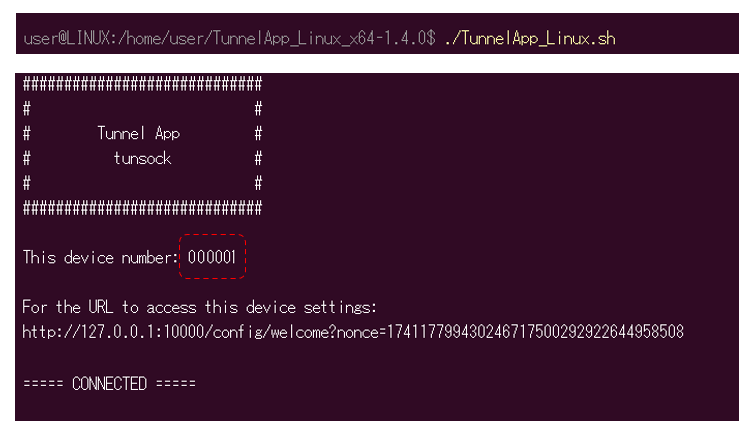
Next, install and launch the "Tunnel App (Linux version)." The following message will then appear on the console. This completes the setup on the Linux PC; no configuration changes to the company's network environment are required. In this example, the terminal number for the Tunnel App is "000001."
PC side setup
For the PC environment, use Windows to install and launch the "Tunnel App (Windows version)." This will display the command prompt and browser screen shown below. In this example, the terminal number for the Tunnel App is "000002."
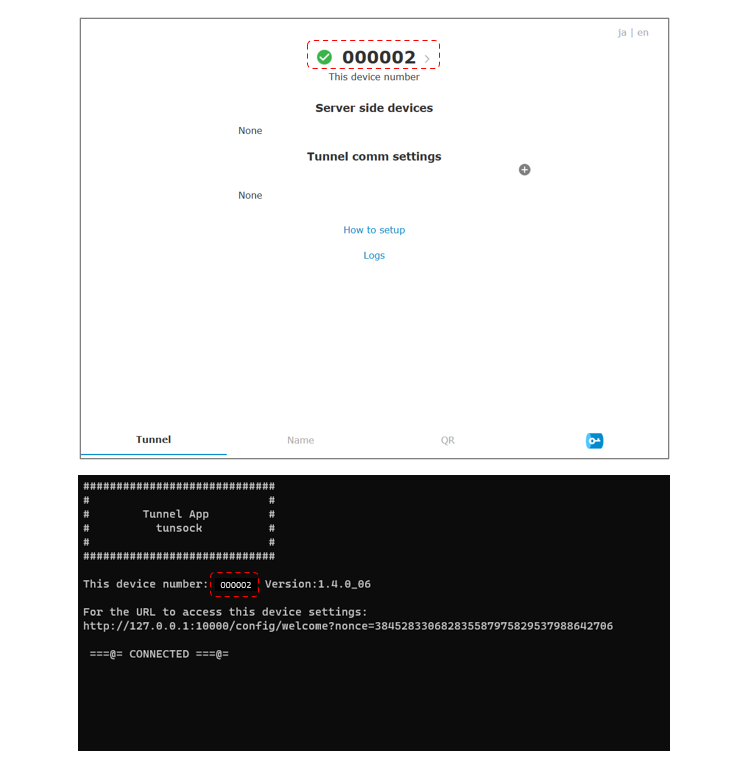
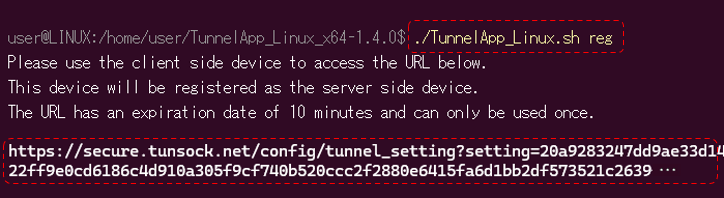
Next, using the tunnel application on the proxy server, obtain the URL required to register this device as the server-side device by running the command "./TunnelApp_Linux.sh reg", and then access that URL using a browser on your PC.
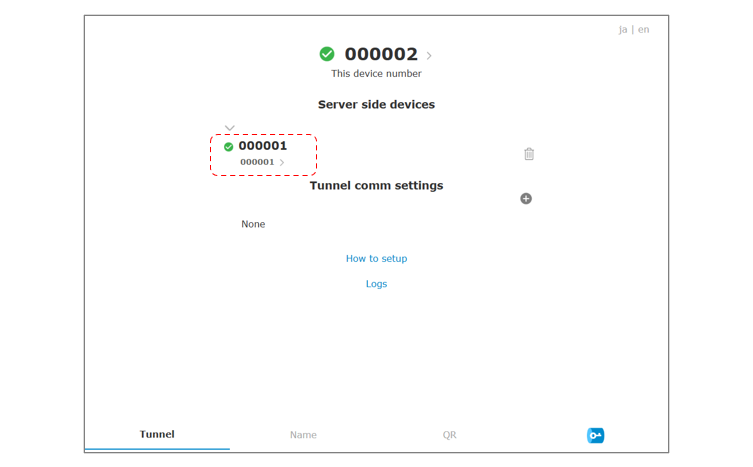
Then, the Tunnel App on the proxy server is registered as a server side device.
Additionally, you can confirm the device number of the Tunnel App on the linked PC from the proxy server side by using the following command "./TunnelApp_Linux.sh clients".

To disable access to the proxy server, you can make the change using the following command "./TunnelApp_Linux.sh disable_client:<Device number>".
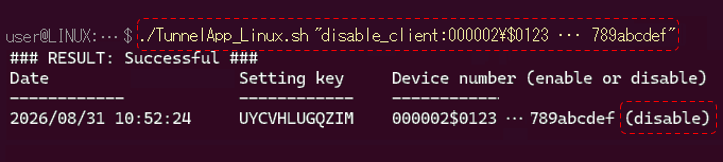
To enable access to the proxy server, you can make the change using the following command "./TunnelApp_Linux.sh enable_client:<Device number>".
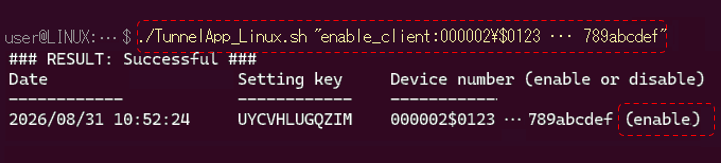
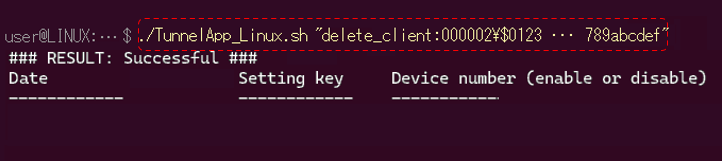
To delete access to the proxy server, you can make the change using the following command "./TunnelApp_Linux.sh delete_client:<Device number>".
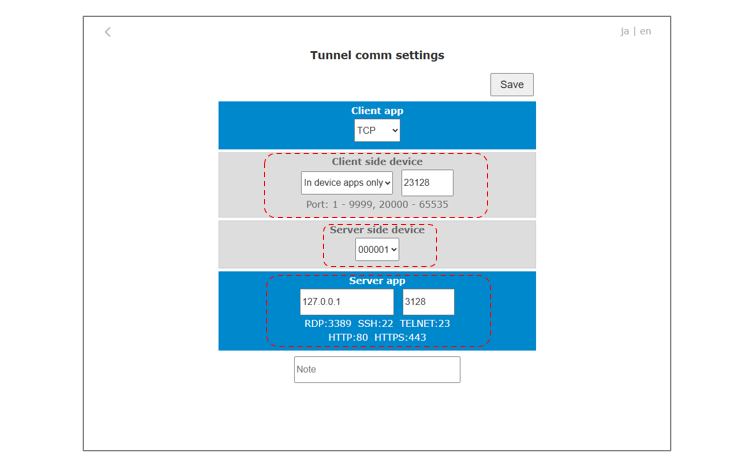
Next, register the tunnel communication settings in the Tunnel App on the PC.
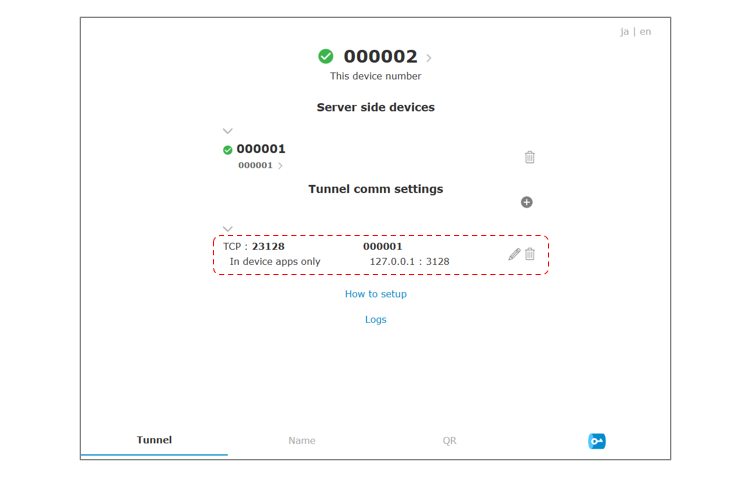
On the client side device, select "In device Apps only" to restrict access to "127.0.0.1 (localhost)," and configure "23128" as the proxy port for accepting access from web browsers.
For the server side device, select the Tunnel App "000001" of the proxy server side, configure the access destination as "127.0.0.1" and port "3128," and save the settings.
In your web browser's HTTP proxy settings, enable "Use setup script" and set the URL to "http://127.0.0.1:10000/proxy.pac".
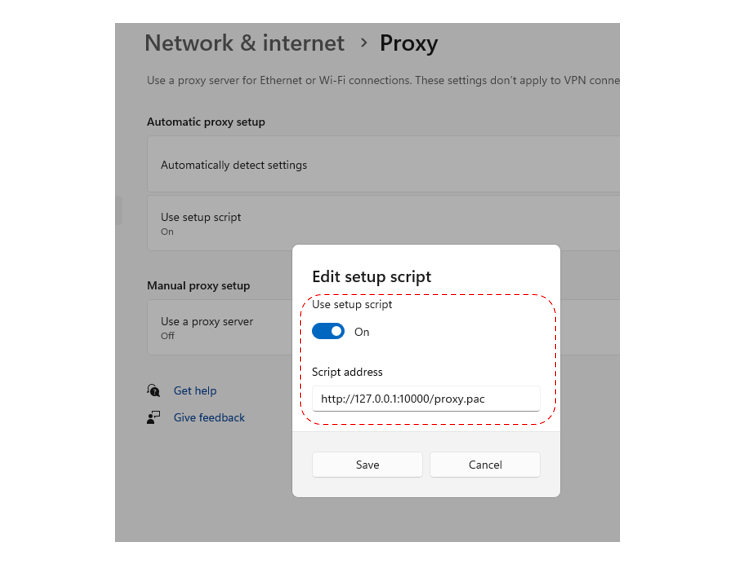
While you can configure the proxy server manually, doing so routes traffic destined for locations other than the private web server through the proxy as well; therefore, we recommend specifying the host using the setup script.
Since the distribution relies on the web server function of the Tunnel App on the PC, create a setup script named "proxy.pac" and save it in the document root folder, as shown below.
function FindProxyForURL(url, host) {
  // Use a proxy for specific hostnames.
  if (host == "private.example.com") {
    return "PROXY 127.0.0.1:23128";
  }
  // All other traffic connects directly.
  return "DIRECT";
}
Location of the document root folder
If you installed the app from a ZIP file:
<Tunnel App installation folder>/docs/proxy.pacIf you installed the app from the Microsoft Store:
C:\Users\[User name]\AppData\Local\Packages\[Package-specific alphanum].TunnelApp-PrivateAccess_[Package-specific alphanum]\LocalCache\Roaming\tunsock\docs\proxy.pac
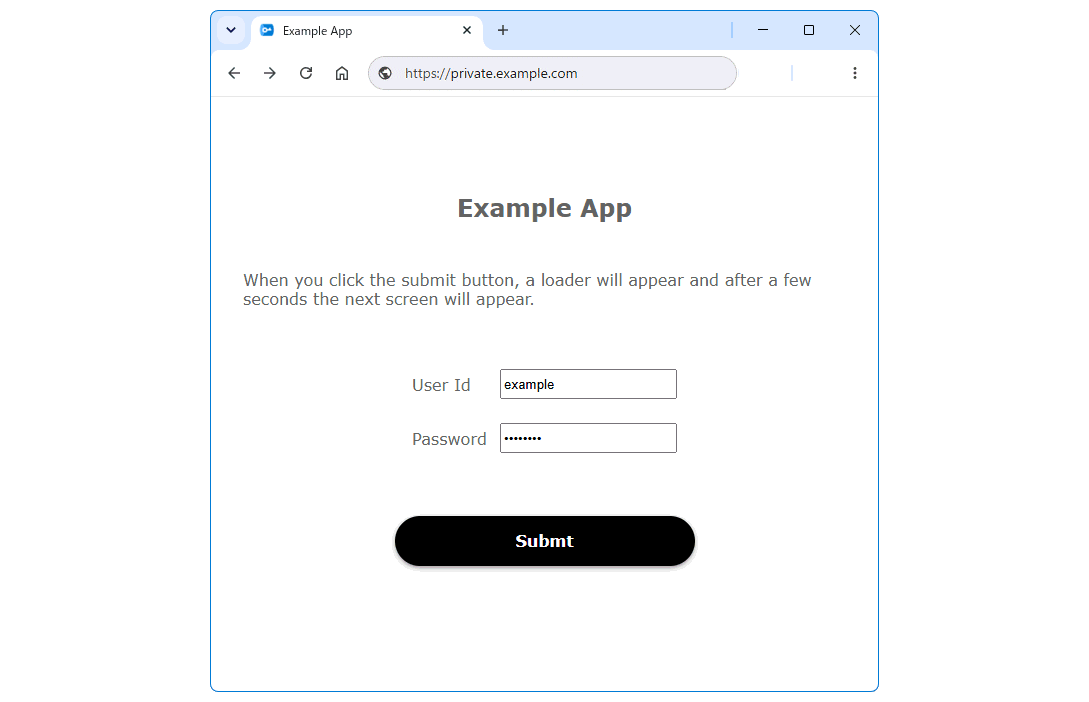
When you access "https://private.example.com" from a web browser, the screen for the sample private web server appears!
The Tunnel App supports up to five simultaneous connections for both client side and server side devices. While there is currently no limit on the number of registered server side devices, sharing them among multiple users increases the likelihood of hitting the simultaneous connection limit.
Until the end Thank you for reading! If you have any opinions, please feel free to send us a message.
P2P · Web · Security